
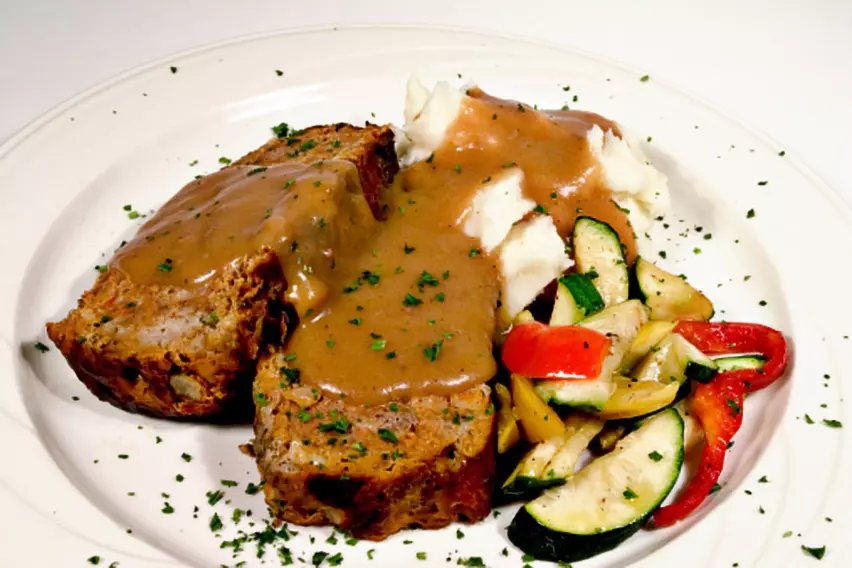
American classics should always be welcome on your game day menu. Your guests will definitely appreciate a nostalgic menu for your football party. Today we pay homage to meatloaf and mashed potatoes, which have graced the tables in America for more than a century. We are, however, going to add a twist to the meatloaf and mashed potatoes you are going to serve. On the game day menu today are Grilled Meatloaf and Cheesy Garlic Smashed Potatoes.
Grilling American Classics
Grilled Meatloaf
We’re introducing you to grilled meatloaf today. It is by far the most delicious way to cook meatloaf. The grilled flavor enhances all American classics, but especially the grilled meatloaf. Your guests will thoroughly enjoy your meatloaf after getting over their initial curiosity. “You grilled meatloaf?” “How did you grill it?” These are only a couple of the questions you will probably have to answer. Once they taste it, they won’t want their meatloaf any other way.
Ingredients
- 2-3 pounds of ground chuck
- 4-6 eggs
- 1/2 cup of milk
- 1/2 cup of your favorite BBQ sauce
- 1 cup of ketchup (optional)
- 2-3 cups of uncooked dry oatmeal
- 1 cup of chopped onions (optional)
- 2 tablespoons Lawry’s Seasoning Salt
- 1 tablespoon black pepper
- 1/2 tablespoon granulated garlic
- Large foil pan
- Meat thermometer
Making Your Loaf
In a large bowl, add in the ground chuck, eggs, BBQ sauce, onions, and seasonings. Reserve the oatmeal and milk. Thoroughly mix all the items together making sure to spread the seasonings all through. Next up, add in the dry oatmeal and milk. Mix the meat, milk, and oatmeal together until it is semi-solid and “moldable.” You may need to add in more oatmeal to get the meatloaf workable.
Torpedo Time
Dump the meat mixture into the large foil pan. It’s now time to form the “Meat Torpedo.” You will want to shape the meatloaf into a torpedo form for grilling purposes. Try and achieve the thickness of your usual piece of meatloaf from end to end. This shape helps the meatloaf cook evenly on the grill.
Grilling Time
Set up your grill in the three-zone method as described in our Grilling Basics piece. Place around 20-25 charcoal briquettes on opposite sides of your grill and light them. Once they get to that “perfect grey,” it’s time to launch your torpedo. Take the foil pan to the grill and gently raise one side so that your torpedo rolls slowly onto the middle of your grill grate. Use caution when placing the meatloaf on the grill — you don’t want to split your delicious meal into multiple loaves.
A word of caution for you gas grillers. DO NOT grill your meatloaf over open flame. If you can place the meatloaf over a section of your grill that is not lit, give it a try. Use low temps with a gas grill, and stick close by while it cooks. The last thing you want is to be featured in the next viral video of a fire raging on a backyard gas grill as people are scrambling for cover. It may take a bit longer than using charcoal, but the flavor is worth it.
Meatloaf Watch
Let the meatloaf grill undisturbed for an hour, then open the lid and see how it looks. Take your meat thermometer and take the temp in the middle of the loaf. If your meatloaf is nearing 160 degrees Fahrenheit, it’s time for the next step.
Grab two sturdy spatulas and gently begin to pry up the bottom of the meatloaf. Once you have freed the torpedo, use the spatulas to slide it over to one side. After this step, roll the meatloaf onto its other side, back to the middle of the grill grate. This will ensure even cooking and also better appearance. Close the lid and let the meatloaf grill for 30-60 more minutes.
After the additional grilling time, recheck the meatloaf temp with the thermometer. Your target temp is 180 degrees Fahrenheit. If your meatloaf is at 180, brush the ketchup on top and let it grill another five minutes.
It’s now time to remove the meatloaf and plate it for your guests. Take the spatulas and pry up the meatloaf bottom so that it’s free from the grill grate. Place the platter next to the meatloaf and carefully place it onto the platter.
Serving Time
Allow your meatloaf to rest 15-20 minutes before slicing. Your guests will be amazed at the improved flavor you achieved by grilling your meatloaf.
For those of you who like spicy flavor, you can swap out the onions for chopped jalapenos. The heat from the jalapenos is countered by the meat mixture so it’s not that spicy. The jalapeño meatloaf has a zip to it, but even your wimpiest guests will enjoy it without whining “it’s too hot.”
Cheesy Garlic Smashed Potatoes
Ingredients
- 3-5 pounds of golden potatoes
- 1 full garlic clove
- 1/2-1 cup of milk
- 1 stick of butter
- 1 pound shredded cheddar cheese
- sturdy foil pan
- salt & pepper to taste
Take the garlic clove and separate each piece of garlic and remove all of the skin, exposing the yummy garlic pieces. Chop up the golden potatoes into small cubes with the potato skin still on. Place the potato cubes and garlic pieces into a large pot of water with 2 tablespoons of salt. Boil the potatoes and garlic until the potatoes are done, then drain. Add in the stick of butter and allow to melt.
Use a potato masher or electric beater to smash the potatoes, adding the 1/2 cup of milk as you go. Once you have the potatoes ready, add in a half pound of the shredded cheddar cheese. Stir in the cheese so it’s spread evenly throughout, then season to taste with the salt and pepper.
Next, take the potato mixture and place into the sturdy foil pan. Take the remaining shredded cheddar and sprinkle it on top of the potatoes, and cover with foil.
Bake for 30 minutes at 350 degrees Fahrenheit; then remove the foil cover. Bake for an additional 15-20 minutes to “brown up” the cheese. I usually serve my cheesy garlic smashed potatoes with gravy from Popeye’s Chicken. They are absolutely delicious without gravy too, so it’s your call.
American Classics
Our twists on these two American Classics will amaze your game day guests. They will appreciate the trip down memory lane as they thoroughly enjoy themselves.
Be sure to check back as we continue to bring you delicious game day menus during football season. Listed below are our previous game day menus, enjoy!
- Halloween Game Day Menu: New Orleans Style
- Football Season Begins: What’s on Your menu?
- Oktoberfest and Your Sunday Football Menu
- Football Game Day Means Chili, Chili Dogs, and Chili Boats
- Football Game Day Menu – Road Trip To Italy
Main Image Credit: