A Rib Fest is the perfect way to kick off the summer grilling season. Most Grill Masters know that true grilling has no “season” as they have a yearlong infatuation with their grilling efforts. The rest of the grillers usually get serious around Memorial Day. As seen in our piece from last year – Memorial Day Celebrations we paid tribute to how that weekend kicks off summer grilling for most people. In 2018 we had a two-part series that featured side dishes and some incredible burgers. Today we are having our Rib Fest piece that provides you the proper way to grill your Baby Back Ribs as well as a great side dish of Hobo Taters.
Rib Fest Done Right
Grilling up a successful Rib Fest requires some preparation and time. There are several steps to creating ribs that the sheltered in place family will fall in love with. You will be a hero in their eyes once again as we give you the basics on how to prep and grill for your rib fest.
Rib Fest Grilling Method
It’s time to review a favorite grilling method called indirect grilling. This is a method of grilling everyone enjoys using when dealing with larger cuts of meat like roasts, ribs, pork shoulders, whole chickens or turkeys, to name a few. Indirect grilling works great when using wood chips to smoke your meat for extra flavor. There are some basic methods of indirect grilling that vary depending on the type of meat involved.
Three Zone Method
We are suggesting the three-zone method of indirect grilling which involves placing charcoal briquettes on both sides of the grill leaving the center zone open. This method works great when grilling baby back ribs using the stacked formation. Place 20-25 briquettes on both sides of the grill and light them up. Once the coals are ready, the ribs will be placed stacked in a pile of two to three racks down the middle of the grill between the coals. You will also be adding hickory wood chips soaked in water to both sides of the grill to get the great smoked flavor. Grilling time for the ribs will run 4-6 hours.
Rib Fest Rub
To make your rub combine the following ingredients in a bowl and mix them all together:
- Lawry’s Seasoning Salt
- Black Pepper
- Cajun Spice
- Paprika
- Brown Sugar
You may also invest in a premade rub instead of creating your own. You can order either Burnt Finger’s BBQ’s Smokey KC Barbecue Seasoning or Obie Cue’s Sweet Rub BBQ Spice online. Both are incredibly delicious and work well on ribs, chicken, beef, and all pork.
in addition, be sure to have honey on hand for drizzling once the ribs hit the grill.
Rib Prep
Once your rub is ready, it’s time to prep the ribs. You will need to remove the membrane from the backside of the ribs. The easiest way is to take a knife and start prying up the membrane at the smallest end of the ribs. Once you have it started, take a paper towel and grab the membrane while pulling it toward the larger end of the ribs. It takes practice, but once you master it, you will have no problems getting it off in one piece.
After removing the membranes, place the ribs in a large foil pan. Next up take the rub mix and sprinkle it on both sides of the rack. Be sure to rub it in as you go along. Do the same with the other racks of ribs until they’re all seasoned. If you have any extra rub, save it until the ribs are going on the grill.
Grill Time
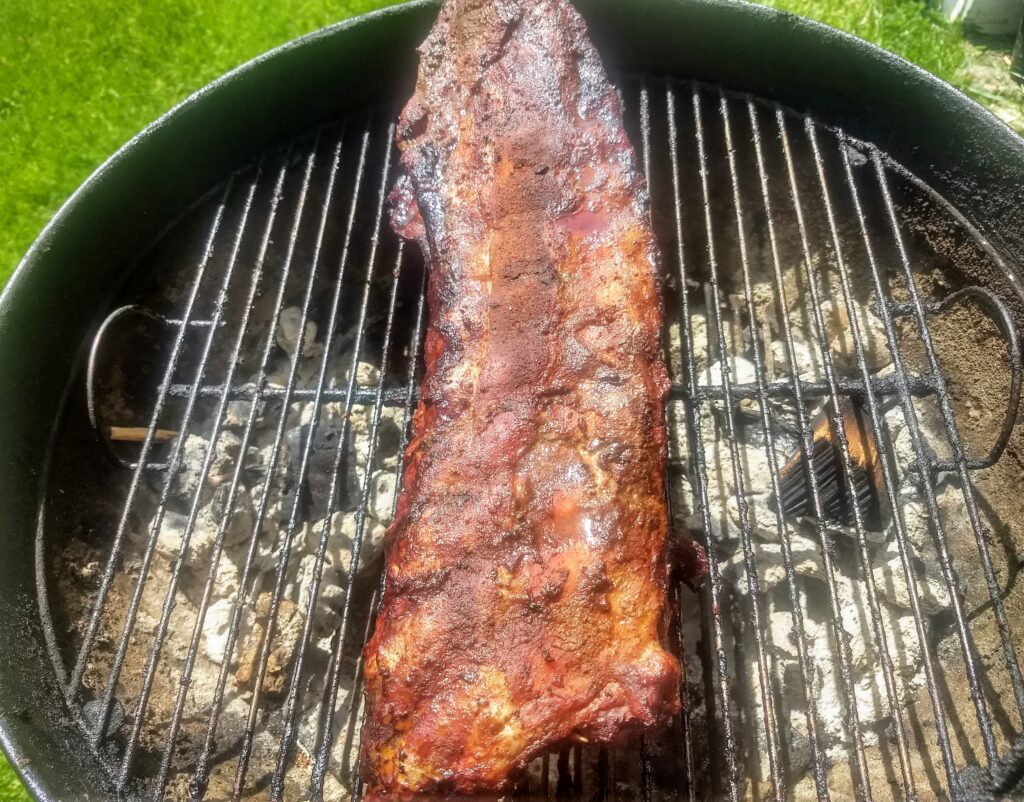
When the ribs are fully seasoned, light the grill using the three-zone method as described earlier. When the charcoal on both sides of the grill is ready, add several pieces of your soaked hickory wood chips to the top of the coals. Replace the grate making sure to place the two handles over the coals to allow for wood chips later. Place one rack of ribs on the grill, and take the honey and drizzle it on the top of the ribs. Take any extra rub mix you have and sprinkle some of it onto the honey drizzled ribs. Do the same with the next 1-2 racks of ribs, drizzling honey and sprinkling the rub mix. Place on the grill lid leaving the vent halfway open directly above one end of the ribs. You will see and smell delicious smoke rising out of the vent after a few minutes.
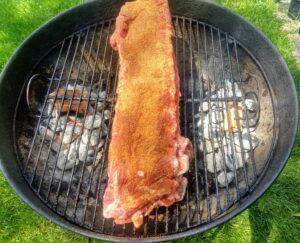
Let There Be Smoke
Allow the ribs to smoke for 30-35 minutes, then “shuffle the ribs” and add more chips if needed. Do this every 30-35 minutes, shuffling the ribs to get an even smoke flavor. The ribs should cook for about three hours so you may need to add additional coals to keep up the heat level.
Rib Fest Foil Nap
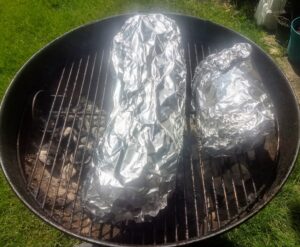
The next step in making successful ribs is called the foil nap. You will need a large foil pan and some wide heavy-duty aluminum foil. Place a layer of foil on the bottom of the pan from end-to-end. Take the ribs off the grill and stack them on the foil in the pan. Once you have the ribs stacked, fold the foil around the ribs sealing them up for their nap. You may need a second piece of foil to do the job right.
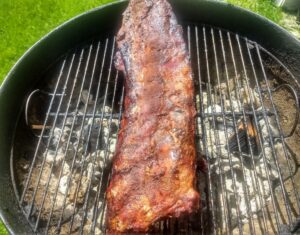
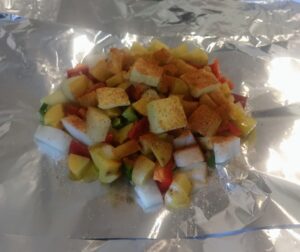
Carefully place the foil package of ribs back onto the grill and add 10-15 more briquettes to each side. It is at this time that you can head inside to prep your Hobo Taters. Follow the directions and recipe below to get the potatoes prepped. They will need to go onto the grill when the new briquettes are getting ready.
After about 90 minutes, remove the ribs pouch from the grill and place it into your large foil pan. It is now time to sauce your ribs using your favorite BBB sauce. Gently place a rack onto the grill and sauce them up on both sides of the ribs. Do this with each rack as you stack them up again.
Close the lid and let them grill for 10-15 minutes. You will once again do the rib shuffle adding more sauce as you go. Repeat this until all of your racks have spent time at the top of the stack. Remove them and let them rest for 10-15 minutes. Racks can be cut into thirds, halves, or individual ribs depending on how many people you are feeding. Serve them up with the Hobo Taters below, our classic Down-Home Pinto Beans, and of course your favorite adult beverage.
Hobo Taters
Ingredients
- 3-4 pounds Yukon Gold potatoes
- 1 sweet onion
- 1-2 jalapenos (optional)
- 1 large red pepper (optional)
- salt, pepper, granulated garlic, and Lawry’s seasoning salt
- half stick of butter
- olive oil
- roll of extra-wide aluminum foil
- non-stick cooking spray (optional)
Cut the potatoes, onion, jalapenos, and red pepper into bite-sized pieces. Layout two long sheets of foil, making a cross. Spray the foil with the non-stick spray (optional), then place the cut-up goodies in the center. Cut the butter into smaller pieces and spread them around on top. Drizzle some olive oil then season everything to taste. Take the top sheet of foil and make a tight pouch. Turn this over and then wrap it with the second piece of foil, making a tightly sealed pouch.
Head to the grill where the new briquettes you added should be now ready. Place the pouch on one side directly over the coals and close the lid. The Hobo Taters will grill alongside your ribs for an hour then you will want to turn them over. Grill for another hour and then remove. Allow the pouch to rest for 15 minutes then cut it open to vent. Place the incredible contents in a large serving bowl for your family to enjoy. Hobo Taters make a great side dish for your rib fest. The flavors of the spices, olive oil, and the butter meld deliciously while simmering on the grill.

Rib Fest Concluded
Grilling up some delicious ribs is a summer tradition. The smoke that drifts away from your grill for 5-6 hours is guaranteed to drive your neighbors nuts. You may want to share, but that is up to you.
Following our directions will also bring you ribs that are amazingly delicious as well as tender. Stay safe and healthy and remember to use a curbside pickup or home delivery for all of your food shopping needs!

Love it!